 Hello, hello! Ah yes, a pastel vanilla sprinkly cake! Hehe. But wait, before you wonder why the heck I'm sharing yet another vanilla cake recipe, it's because this is truly, honestly, 100% the only vanilla birthday cake recipe you will ever need. A bold statement, but I vow that this cake is where my heart lives. Guys! While it's not radically different than the vanilla cakes I've shared over the years, it's that it really is the most tender, flavourful and spot-on, go-to, childhood-memory-evoking cake I've made. Aside from being perfectly unfussy and simple to make, it's just the textures and flavours that dreams are made of.
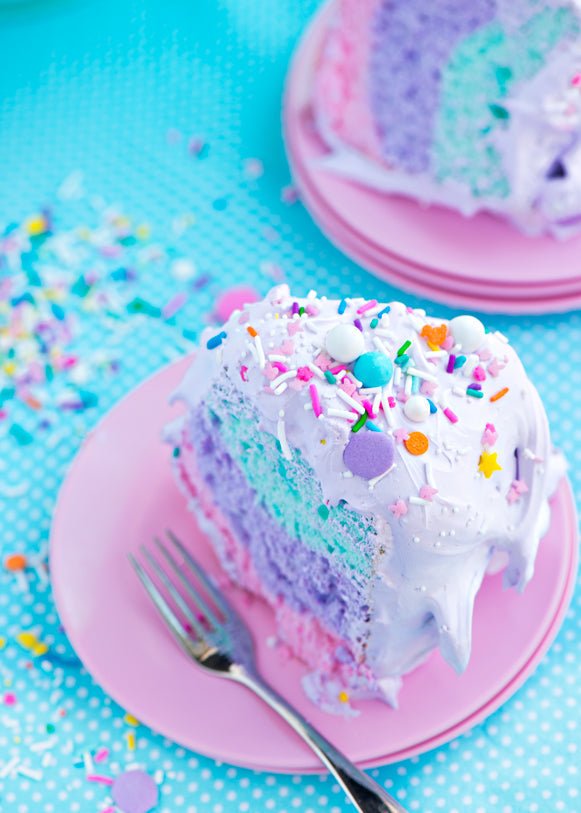
  A classic, pastel, 3-layer birthday cake! I think no matter how many innovations and creativity are brought to the world of baking and caking, having a "perfect" vanilla cake + birthday cake frosting recipe is a huge win. It's what brings us all back to those days of childhood, and warms our hearts. I love adding just a tiny bit of colour and a good dose of sprinkles (in this case, too many really would be too many) to give it a real bakery feel. There's just nothing that speaks to me more as a baker (and little girl at heart), than this aesthetic and flavour combination.
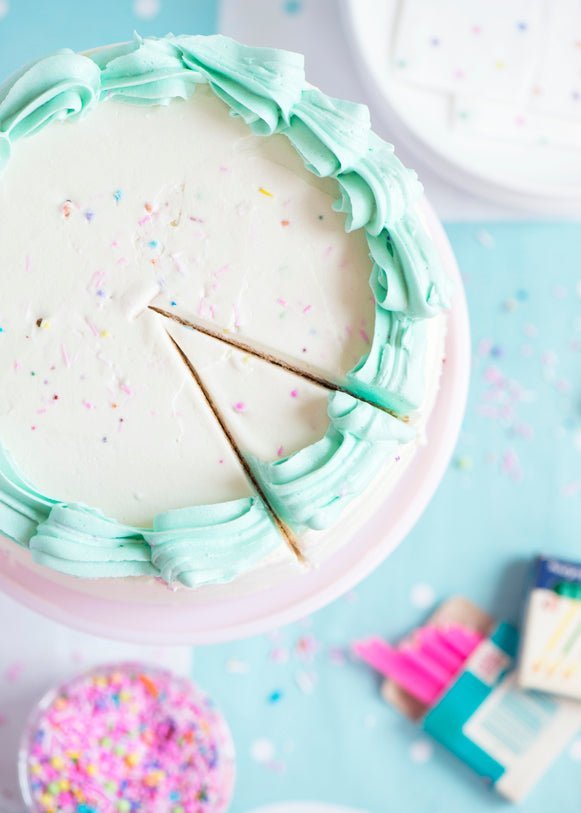
So the cake layers in the Best Buttermilk Birthday Cake are, well, buttermilk cake layers. But whoa, they are so buttery and soft. This is a slight modification from the Buttermilk Cake in the Sweetapolita Bakebook, and that cake is one of my favourites in all of the book! With a generous 5 eggs, lots of buttermilk, butter, premium vanilla bean paste and more, it's an incredible base for really any cake you want to build--adding other flavours or even pairing it with virtually any filling, frosting or topping. The best building block in my vanilla cake repertoire. 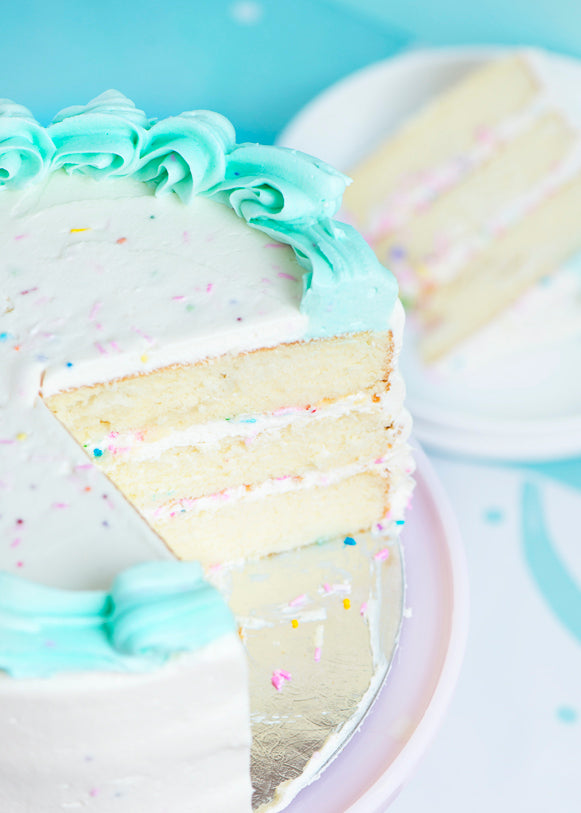 You can see the tender, delightful crumb the cake yields, and now let's talk about the frosting... So, as you probably know, I love a good fluffy sweet frosting, and as much as I love Swiss Meringue Buttercream, there really just is a time and place for a super creamy but sweet frosting. Again, it's that sweetness and fluffiness that airdrops me directly to my childhood birthdays. Mom used to get my cakes at the grocery store, at my request. A girly heart-shaped vanilla cake with stark white frosting, adorned with pink buttercream borders and topped with a few pink roses and, of course, a neatly scripted, pink gel "Happy Birthday Rosanne." So with that in my heart, I was so eager to try Christina Tosi's "Birthday Cake Frosting," from her Momofuko Milk Bar cookbook. You've likely all seen her famous and pretty-darn-awesome naked Birthday Layer Cake, based on those very grocery store birthday cakes I am referring to. While making her full recipe for the Birthday Layer Cake is near the top of my t0-bake list, I was most eager to try her frosting. So, I took her frosting recipe and modified it slightly to work with what I stock in my cupboards, and with some of the little frosting habits I can't abandon, I whipped up what I consider to be the best bakery-style frosting I have ever tasted.
  While this frosting recipe isn't that much of a departure from my most-used party frosting, I think what makes this frosting so magical, is the use of shortening (and butter), light corn syrup, dollops of cream cheese and tiny bit of acidity. Christina's recipes calls for glucose (a very thick clear sugary syrup) and corn syrup, and she also calls for a pinch of baking powder and citric acid. These are the ingredients I opted out of using, and instead I simply used light corn syrup (no glucose) and I used a few drops of lemon extract for the subtle zing.
  The result is fluffy, smooth, creamy and so light. Sweet, with an underlying zing of cream cheese, but if you didn't know there was cream cheese in there, you might not even be able to pinpoint that. There is nothing dense or thick about this frosting, which also makes it a dream to work with, both for frosting the actual cake and for piping. (As I always say, the consistency of your frosting is 90% of the battle when it comes to applying frosting to a cake or piping lovely borders.)
  Just for fun, I added our Sugar Cookie Sprinkle Medley which is ideal for adding to cakes and frosting, as the colours won't bleed in this recipe. As Sugar Cookie is on a hiatus in the Sprinkle Shop, you can also use Rainbow Sprinkles or Rainbow Bit Chips. The texture and taste of the coated chips in the frosting are reminiscent of the Betty Crocker Rainbow Chip Frosting I used to eat by the spoonful as a teenager. The chips soften up just the slightest bit, but the sprinkles remain crunchy. Basically it's everything we daydream about. We add the sprinkles in between the layers and then into the actual frosting for a little hit of sprinkled cuteness.
  Yesss... Okay, now please go make this cake! xo
Best Buttermilk Birthday Cake
3 layers of super-moist, vanilla buttermilk cake filled with fluffy white frosting and sprinkles. (Cake layers from The Sweetapolita Bakebook, and the frosting is adapted from Momofuko Milk Bar Cookbook).
For the Buttermilk Cake layers:
- 3 cups (350g) cake flour
- 2 cups (400g) superfine sugar
- 1 tbsp + 1 tsp baking powder
- 3/4 tsp salt
- 1 cup (227g/2 sticks) cold unsalted butter, cut into pieces
- 1 1/2 cups (360ml) buttermilk, room temperature
- 2 tsp (10ml) vanilla bean paste or pure vanilla extract (you can also use seeds from 1/2 vanilla bean)
- 1/4 tsp pure almond extract
- 5 whole eggs, room temperature
For the Birthday Cake frosting:
- 1 cups (230g/2 sticks) unsalted butter, room temperature
- 1/2 cup (100g) vegetable shortening
- 3 tbsp (45ml) clear corn syrup (see notes)
- 1 tbsp (15ml) pure vanilla extract
- 1/8 tsp lemon extract
- 2 1/2 cups (400g) confectioners' sugar
- 1/2 tsp fine salt
- 1/2 cup (110g) cream cheese, softened
- 1/2 cup (4oz) sprinkles, preferably jimmies + coated chips. I used a limited edition Sweetapolita medley that contained both, but you can use any sprinkles that make you happy!
- Few drops turquoise food color (see notes)
Special Tools:
- Piping tip Ateco #887
- 18" piping bag
For the Buttermilk Cake layers:
-
Preheat the oven to 350℉ (180℃). Grease the bottoms of three 8 x 2-inch round cake pans and line with parchment.
-
In the bowl of an electric mixer fitted with the paddle attachment, whisk together the flour, sugar, baking powder, and salt. With the mixer running on low speed, add the cold butter one piece at a time. Beat until all of the butter is incorporated, about 3 minutes. The mixture should have a fine crumble, cornmeal-like texture.
-
In a medium measuring cup with a spout, combine 1 cup (240ml) of the buttermilk, vanilla and almond extract. In a separate measuring cup, gently whisk the eggs and remaining buttermilk.
-
Increase the mixer speed to medium-low. Gradually add the vanilla mixture and beat for 5 minutes. Scrape the sides and bottom of the bowl with a rubber spatula. Reduce the mixer speed to low and gradually add the egg mixture in three additions, scraping the sides of the bowl after each addition. Beat until well combined, 2 minutes. Fold the batter once or twice to ensure everything has been incorporated. Divide the batter evenly among the prepared pans.
-
Bake the first two layers in the centre of the oven until a wooden pick inserted into the centre comes out with a few crumbs, 20 to 22 minutes. Repeat with the final layer. Let the cake layers cool in their pans on wire racks for 10 minutes. Using a knife, loosen the sides of the cakes and carefully turn them out onto wire racks. Peel off the paper liners and let cool completely.
-
The cake layers will keep wrapped tightly in plastic wrap at room temperature for up to 3 days.
For the Birthday Cake frosting:
-
Combine the butter and shortening in the bowl of a stand mixer fitted with the paddle attachment (or a regular mixing bowl if you are using a hand-held mixer), and beat on medium-high speed for about 3 minutes, until the mixture is creamy and fluffy. Scrape down the sides of the bowl.
-
With the mixer on low speed, stream in the corn syrup, vanilla and lemon extract. Turn the mixer up to medium-high, and beat for 3 minutes. Scrape down the sides of the bowl.
-
Add the confectioners' sugar and salt and beat on low speed until incorporated. Turn the mixer back up to medium-high and beat for 3 more minutes, until you have shiny, creamy, smooth frosting.
-
Add the softened cream cheese, and beat on medium speed until combined, about 1 minute. Don't over-beat, or the frosting will become too thin (due to the cream cheese).
-
Frosting will keep in an airtight container in the fridge for up to 1 week. Bring to room temperature and beat on low speed
Assemble the Buttermilk Birthday Cake:
-
Place one of the cake layers, top up, on a cake board or plate (reserve the "sharpest" edged layer for the top). Using a small offset palette knife, spread 1 1/4 cups of the frosting top, extending slightly past the cake's edge. Sprinkle the layer of frosting with some of the sprinkles. Repeat these steps until you come to the final cake layer, which you will place bottom up. Using a straight palette knife, smooth the frosting protruding from the layers on the sides of the cake. Chill for 15 minutes.
-
Remove the cake from the refrigerator, and apply a thin layer of frosting over the cake to seal in crumbs (known as the crumb coat). Return the cake to the refrigerator and chill until the frosting is slightly set, about 15 minutes.
-
While the cake is chilling, scoop out about 2 cups of the remaining frosting and tint it very pastel turquoise (about 1 drop). Add the rest of the sprinkles to the remaning white frosting. Fit an 18" pastry bag with a large closed star tip (I use Ateco #887) and transfer the turquoise frosting to the bag.
-
Remove the cake from the refrigerator and apply a smooth, thick layer of the sprinkled frosting. Pipe a border around the top perimeter.
-
The cake will keep at room temperature for up to 12 hours. Refrigerate for up to 3 days, but serve at room temperature if possible.
Sweetapolita's Notes:
- I used Swans Down Cake Flour for this cake, which I bought when I was in the USA last. While Canada is known for the best flour products, I have to say that this stuff is top notch!
- For the cake pans, I use these Fat Daddio's 8-inch x 2-inch round pans. It's so handy to have 3!
- For the the vanilla bean paste, I used Nielsen Massey Madagascar Bourbon Vanilla Bean Paste. For pure vanilla extract, I always use Nielsen Massey Bourbon Vanilla Extract.
- When frosting a cake, I always use this Ateco turntable, an offset icing spatula and a straight icing spatula.
- For the sprinkles, I used Sweetapolita "Sugar Cookie" Sprinkle Medley (limited edition), but you can use any sprinkles you love! I just recommend you use jimmies and coated chips, as they work so well in the frosting.
- You can make and keep this cake assembled for a day before you serve. You can keep it at a cool room temperature, or in the fridge, but just make sure it's room temperature when you serve it.
- The cake stand in this post is one of my favourites! It's a pink Mosser 9" round cake stand. Has such a classic, vintage vibe.
- To achieve a similar colour to this cake, try any of the Sweetapolita Oil-based Food Colours. You can find them individually, or in a set here!