I've received so many emails and comments asking about the ever-intimidating Swiss Meringue Buttercream (let's call it SMB), that I thought it may help to run through how to make this glorious not-too-sweet and satiny-smooth delight. Warning: this is a very wordy post, and it's seriously lacking fun and pretty photos. So, if you're up for it, let's talk SMB!
I remember sitting down for one of my very first courses at Bonnie Gordon College of Confectionary Arts, and learning about how this was the ultimate buttercream for wedding cakes, birthday cakes, fancy cupcakes, and pretty much any cake at all. Up until that point, I, like many, loved sugary frosting made with powdered sugar, butter, etc., because it's really all I knew. I will admit that there is definitely a place in my heart for super-sweet frostings, because that's just me—a devoted sugar junkie—but once I got a taste for "the good stuff," I rarely opt for the other on a cake. Cupcakes, well, I think that is where sugary frosting rocks it like no other. SMB is gorgeous on cupcakes, but for me, there's nothing like a super-sweet cupcake fix.
It was explained to my class that if we planned on making wedding or event cakes, we need to embrace SMB, since it's most often used under fondant as well as on its own for fancy cakes. There really is no comparison. The key, though, is enjoying SMB at room temperature. As soon as it starts to chill in the refrigerator, it solidifies, much like pure butter, and biting into that consistency just doesn't have the same appeal as tasting fluffy, satiny icing. You also really taste all of the flavours in both the cake and the fillings/frostings when they are at room temperature.
In the world of meringue buttercream, there are really three main types: Swiss, Italian, and French. What is Swiss Meringue Buttercream exactly? Essentially, SMB is a meringue-based buttercream (what gave it away?) in which copious amounts of butter are whipped into a sugary whisked meringue base, followed by pretty much any flavour—chocolate, purée, extract, etc. It's a super-stable, resilient, and delightful buttercream that I simply cannot get enough of. The variations are endless: vanilla bean, raspberry, mocha, caramel... endless!
I should mention that Swiss Meringue Buttercream and Italian Meringue Buttercream are almost identical, but the difference lies in the method: SMB is created by heating and whisking white sugar and egg whites over a bain-marie (simmering water on the stove) to about 140°F (60°C), before whipping the meringue. Italian Meringue Buttercream is created by adding a heated sugar syrup into an already whipped meringue base, followed by the addition of butter and flavours. There is also French Meringue Buttercream, albeit less popular from what I can tell, which is created by whipping the egg whites while adding a steady flow of white sugar until it thickens, followed by adding the butter and flavourings.

Because we are first making the meringue portion of the buttercream, we want to ensure everything is grease-free, otherwise the meringue won't do it's "meringuey" job the way it needs to. Even a trace of grease can cause the meringue to flop. So, let's take a paper towel with some lemon juice or vinegar and wipe our equipment clean. I also have white rubber spatulas that are devoted to meringue only—royal icing, meringue, etc.

Now that everything is meringue friendly, let's set up a bain marie (a fancy term for a pot of simmering water on the stove). You don't want the water to come close to the bottom of the bowl you're going to place on top, nor do you want the water to be at a rolling boil (let's not cook those egg whites), so even just an inch or so of water will do.

Then I take the butter from the refrigerator and cut it up into cubes and leave on the counter while I complete the rest of the steps.

Now we measure/weigh (I prefer to weigh) our granulated sugar. Using a measuring cup, or other bowl, place it on the scale, tare it so it so the scale starts back at zero, and add the sugar until you have the correct amount (I was making a bigger batch in the these photos, so disregard the 800 g).

Clip on your candy thermometer and add your egg whites. Whisk gently, but constantly, until it reaches 140°F (60°C). A quick note about egg whites: I wanted to talk about the issue of using fresh egg whites versus 100% egg whites in the carton for meringue. To be honest, I got used to using the cartons of 100% egg whites during what seemed to be the longest stretch of being pregnant—I loved knowing that they were pasteurized and completely safe.
I also love that I can make large batches of meringue without wasting yolks (although there are many fabulous uses for yolks only, but it's just easier for me to not go through all of those eggs), and simply weigh the total of egg whites needed on my kitchen scale and get whisking. The thing is, some bakers swear that the liquid egg whites don't whip up quite as stable and thick as fresh egg whites do, and I've heard that due to the fact that during the process of being pasteurized, the egg whites are heated to a point that, yes, makes them safer to eat, but prevents them from foaming and whipping up into a stable meringue.
I have to tell you that I've always used Naturegg brand 100% liquid egg whites, and they've worked very well for me. Today, though, I was curious about this, so I whisked up a batch of meringue using fresh egg whites. I definitely noticed a difference, but it was slight. I think, personally, I would opt for real egg whites for baking meringue, and liquid egg whites for buttercreams.

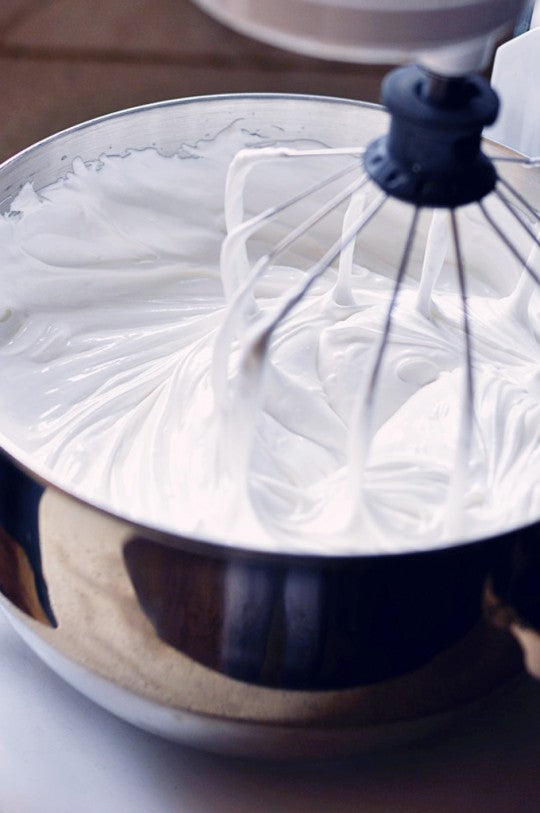
Once your egg whites and sugar have reached 140°F, take the bowl off of the stove and back to the mixer, where you will use the whisk attachment to whip up the meringue. I start on about medium-low (3 on the KitchenAid) for the first moment or so, and then increase to medium-high (7 on the KitchenAid). This photo was taken about 2 minutes into beating the egg whites. It typically takes about 10 minutes for the meringue to become thick, glossy, and cool.

Here it is a few moments later. You can see it's fluffing up nicely, and becoming nice and glossy.

At this point, a few moments later, it's looking nice and thick, but the outside of the bowl is still hot to the touch, so we know it's not quite ready yet. If we threw the butter in there now, it would basically melt. Let's keep whipping it up..

So now the bowl is neutral to the touch and the meringue looks thick and glossy. Just a note that at this point, you have a meringue! You can eat it, as I tend to do, just as it is, or you can pipe it and bake it, or top it onto a lemon pie, or do just about anything with it.
This is Swiss Meringue, just minus the "buttercream" part. Trust me, it's gorgeous and sweet just the way it is. I love this stuff, and I could eat it all, but, since we likely have a naked cake waiting to be prettied, we better add the butter.

Switching over the flat beater of our mixer now and decreasing the mixer speed to low speed, we're going to add cubes of butter, one at a time, until each one is incorporated. This is a few cubes in, so you can see that the meringue has started to deflate, but once we add all of that butter, it will fluff up.

Here it is a few moments later, after more butter was added. You can see that it's actually looking a bit soupy—see, my butter was a bit too soft by the time I stopped to take photos, which is actually great news, because I can show you what it looks like when that happens, and what we can do to fix that.

So, at this point, I've added all of the butter, but, again, because the butter was too soft, it seems too loose. So, I placed the bowl into the refrigerator for about 15 minutes, and then beat the buttercream for a few moments more on low speed. It thickened up, but was still a bit loose, so I added a few extra cubes of butter and mixed for a moment or two.

So, it's getting much thicker, but doesn't it look almost scrambled-egg like? Under any other circumstances in the kitchen, that would seem scary and disheartening, well, unless of course you're actually making scrambled eggs, but like I said SMB is very forgiving. Just keep on whipping this up in the mixer on low speed, and it should just magically thicken up and come together. Let's have a moment of silence for all of those batches of SMB that were thrown in the garbage at this stage, because they were deemed hopeless.

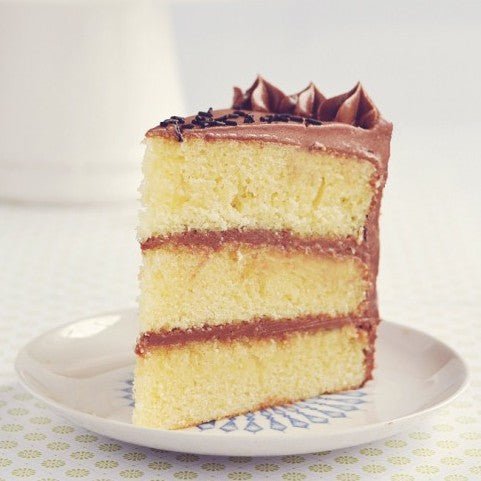
And there you have it! Actually, we almost had it here, but I whipped it for another few moments, added the vanilla and salt, and it ended up as satiny and shiny as it should be—I'm sorry that I must have been distracted! Either way, at this point, it's ready for colouring, additional flavouring, and decorating! Here's an example of cake I did where fluffy and satiny SMB is the star (you can read more about this cake here):

Good luck & let's bake the world happy!


