Hello my friends! I'm happy to report that I lived to tell the story of July 2014. Here are a few of the adventures that have been going on in my world during the past month: 1. I shot the cover of my book! This was a lot of pressure, in a way, but I think it's super-fun and I hope you love it. Speaking of the book, let me tell you that this crazy book o' sugary delights is officially called The Sweetapolita Bakebook. Hooray! I will also be sharing that here with a whole bunch of fun details about the book itself. 2. I turned 40. Oh right, that. But I'm okay! And because I'm all cake-backwards in life, I eat it all year long and get excited to eat some other form of dessert on my birthday. Last year was lemon meringue pie from Betty's in Niagara Falls (and no, I didn't buy a slice, I bought the entire pie). This year was the most decadent of apple caramel crumbles with vanilla bean ice cream. Now I'm back to cake. But you know, 40 isn't so bad. Since the girls are a bit bigger now, I'm finding that I have more time to do the little things that being busy and in your thirties with babies doesn't necessarily allow for--things like painting my nails (often), shopping (and not in the kids' section at Target), organizing my life and closets, doing what I love to do in the kitchen, and more. I think it's going to be a decade of strength, change, adventure and, well, more cake.
 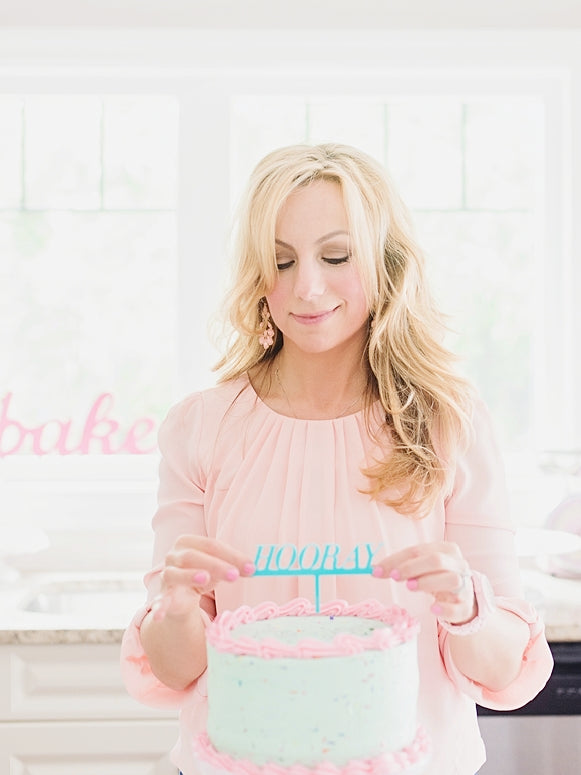 3. I had a super-fun photo shoot done for my author photo and such (above), by the talented Wendy & Michael Lewicki from Wendy Alana Photography near Toronto (you might also know Michael from his incredible blog, Verses from my Kitchen). I fell in love with Wendy's style, and couldn't wait to shoot with them. Just as I suspected, they are amazing people in "real life"--warm, talented, kind, and just the kind of people you want to be around. Even with dark skies, severe heat and humidity in the kitchen during shoot, and the impending storm outside during the shoot, they pulled off some serious magic. I can't wait to work with them again! 4. My sister-in-law got married! And my cakelets were (the world's cutest) flower girls. And I was a bridesmaid (are you still allowed to be called a "bridesmaid" when you're 40?). Oh, and I made a trio of three-tiered vintage-inspired pastel ruffle wedding cakes for the occasion. It was a big, happy, stunningly beautiful, pastel-blue-and-green day! Congratulations, Mary & Ted! ♥
5. I was oven-less for 10 days. As in one-third of the month! It's true. I officially baked the life right out of my other oven, which was only 2 years old. So this whole I-can't-bake-a-cake thing was quite a test to my creativity. But alas, there are so many alternatives: candy-making, no-bake desserts, homemade popsicles, and, of course, ice cream cakes. So, as the serendipitous result of my not having an oven for 10 days, this birthday party ice cream cake was born:  This cake! We should really talk about this cake. I don't actually make enough ice cream cakes, I've decided. They are so easy to do, and can be as simple or as complex as you want them to be. Aside from the whipped cream frosting, every ingredient is store bought, so it's truly just taking ice cream in one form and magically turning it into a cake using cake pans, and then using your imagination to add some elements of texture in between the layers. I probably could have gone crazy with adding fun elements inside this cake, but I think I still kept it simple. The whipped cream frosting is the perfect option for frosting an ice cream cake, because it has such light and airy texture, and isn't very sweet. And since it takes colour so nicely and we can use it to pipe borders and such, it works like a dream.
  So here's the craziness that's going on under that layer of pastel whipped cream frosting. When choosing the flavours for this cake, I turned to my childhood--always a magnificent place to look for inspiration. I thought about all of the treats I loved most, and how I could represent them in this cake. So starting from the bottom, we have an Oreo crumb crust, cotton candy ice cream, Oreos, birthday cake ice cream, bubble gum ice cream, ice cream sandwiches, and then neapolitan ice cream (don't you just love opening those "bricks" of neapolitan ice cream--depending on when you were born, it can really be an instant throwback to childhood). That's a lot of fun in one cake--especially one for which there is only about 15 minutes active time. Because each layer has to be very well chilled before working with it and in between each step, the overall project does take quite a bit of inactive time, so you would want to plan ahead on this one. If you made it over the course of a day and then chilled the whole thing overnight for the next day, it would work best.
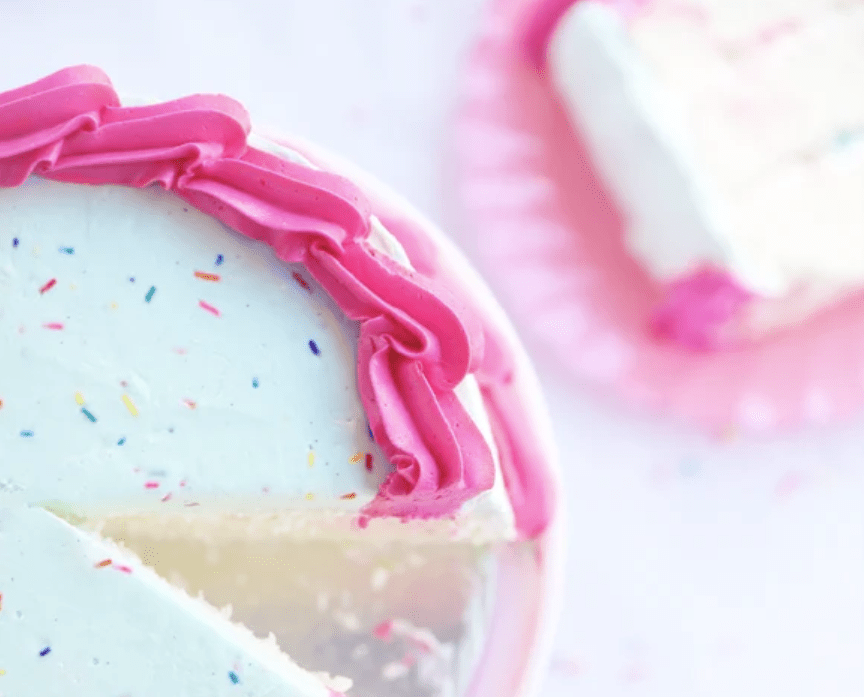
  Delightful, right? What I love about cakes like this, is that each slice is different--like a work of art. ♥
Birthday Party Ice Cream Cake
Who needs an oven to make a 6-layer cake? Layers of cotton candy ice cream, oreos, birthday cake ice cream, bubble gum ice cream, ice cream sandwiches, and neapolitan ice cream sit atop a buttery Oreo crumb crust and are smothered in pastel whipped cream and sprinkles for this ultimate birthday party (or any-day-of-the-week party) ice cream cake.
- 1 1/4 cups 125 g chocolate cookie crumbs (I used Oreo Baking Crumbs)
- 1/4 cup 115 g butter, melted
- 1.5 L carton of each ice cream--cotton candy (birthday cake, bubble gum, and neapolitan, or flavours of your choice (total of 4 standard cartons of ice cream))
- 8-10 chocolate sandwich cookies (such as Oreo)
- 6 classic ice cream sandwiches
For the Whipped Cream Frosting:
- 2 teaspoons gelatin (such as Knox)
- 2 tablespoons cold water
- 2 1/2 cups 600 ml whipping cream
- 1/4 cup 50 g sugar
- Few drops any colour you'd like - try any Sweetapolita Oil Based Colours!
- Sprinkles! (see notes for my sprinkly recommendations)
You will also need:
- 9- inch springform pan
- 2 9- inch round cake pans
- Plastic wrap
- Line the bottom of a 9-inch springform pan with parchment. Cover the inside of two 9-inch cake pans with plastic wrap--bottom and sides--leaving a few inches of overhang.
- Into a medium bowl, add the chocolate cookie crumbs and the butter, and stir until combined. Transfer the crumb mixture into the prepared springform pan, pressing into an even layer (I use the bottom of a measuring cup). Place the pan into the freezer to set for 15 minutes.
- Take one of the ice cream flavours out of the freezer, and use a knife to cut slabs of the ice cream. Transfer all of it onto the crust layer. (If you're using a multi-coloured variety like the cotton candy variety I used, try not to spread it around too much, or the colours will become muddled.) Place a layer of plastic wrap on top and press the ice cream into an even layer. Place the pan back into the freezer for at least 2 hours.
- Meanwhile, repeat this step with the 2 prepared cake pans, adding a layer of bubble gum ice cream to one, and neapolitan to the other. Add a layer of ice cream sandwiches to the top of the bubble gum layer, cutting some in half and quarters to fit as many in as possible. Freeze both pans for at least 2 hours.
- Remove the springform pan from the freezer and remove the plastic wrap. Place the Oreos on top of the ice cream in an even layer. Add all of the birthday cake ice cream and flatten with another layer of plastic wrap. Freeze for at least 2 hours.
Assembly of the Birthday Party Ice Cream Cake:
- Remove the springform pan from the freezer and run a small sharp knife around the edges to loosen. Release the latch and gently remove the outer ring from the cake. Remove the birthday cake layer from the freezer and use the plastic wrap overhang to remove the layer from the pan. Peel off the plastic wrap and place the birthday cake ice cream layer on top of the cake. Repeat with the bubble gum ice cream layer. Finally, remove the neapolitan/ice cream sandwich layer from the freezer and from the pan, and then invert the layer ice-cream sandwich side down and place on top of the cake. Cover the entire cake in plastic wrap, wiggle into place if necessary, and return to the freezer for at least 4-6 hours (ideally overnight) to set.
For the Whipped Cream Frosting:
- Place a stainless stand mixer bowl and the whisk attachment (or if using a hand mixer, a stainless mixing bowl and the mixer beaters) in the freezer for at least 20 minutes.
- Into a small microwave-safe bowl, sprinkle the gelatin onto the water and let sit for 10 minutes. Microwave the mixture for 20 seconds and stir to combine.
- Remove the bowl and whisk from the freezer, add the cream and sugar to the bowl and whip on medium speed for 30 seconds. With the mixer running, add the gelatin mixture in one go. Increase the speed to medium-high and whip until medium-stiff peaks form (thick enough to spread/pipe/hold its shape, but not over-whipped and grainy). Transfer about 1 1/4 cups of the whipped cream to a medium bowl and tint it pastel pink. Cover the pink cream with wrap and refrigerate until ready to pipe the border. Tint the remaining whipped cream turquoise.
- Remove the chilled cake from the freezer and transfer the cake from the springform pan base (remove the parchment round) to a cake board or plate.
- Frost the cake with the turquoise whipped cream, just as you would a regular cake--use a small offset palette knife to cover the top of the cake, and a medium straight palette knife to frost the sides. Return the cake to the freezer for about an hour.
- Remove the pink frosting from the fridge and transfer to a piping bag fitted with a large swirl tip (I used #887). Remove the cake from the freezer and pipe a pink border around the top of the cake. Gently press sprinkles into the bottom third of the cake, and add a few on top, if desired. Return the cake to the freezer until ready to serve. The cake will keep up to 1 week in the freezer.
Sweetapolita's Notes:
- You can modify this recipe to any number of layers--simply omit or add the ice cream layers you wish. Since making extra layers is as simple as spreading ice cream into a plastic-wrap-covered cake pan, you could keep going. And going. #skyhighicecreamcake
- For the colours turquoise and pink, however, any colour combo you love would work perfectly!
- I used Rainbow Crunchy Sprinkles for the sides, but of course you can use any sprinkles you love.
Good luck & enjoy!