Hi guys! With Father's Day coming up, I thought this Root Beer Float Cake would be the perfect option for all of those dads out there! You know...root beer, chocolate, ice cream...sprinkles! (Trust me, dads worldwide, love these things.) It's also perfect for birthdays or any given Tuesday.
So, what is a Root Beer Float Cake exactly? Well, it's an adaptation from the Chocolate Root Beer Float Cake in The Sweetapolita Bakebook and it's one of my all-time favourites! That aside, in detail, it's four layers of super-moist, buttery chocolate root beer-infused cake filled with creamy vanilla "ice cream" frosting, topped with fluffy, satiny root-beery chocolate frosting and topped with shiny chocolate root beer glaze, scoops of vanilla ice cream frosting and sprinkles (of course). The root beer infusion (actual root beer, as well as quality root beer flavour oil) is present and authentic enough to taste it instantly, but subtle enough that it balances so well with the rich chocolate and vanilla bean flavours, frostings and fillings. Together, the result is a root beer float in cake form--chocolate style. Let's take a closer look:  So we have the four layers of the root beer cake itself--this is a taller, but smaller diameter 6-inch version (in the book it's a slightly bigger batch of batter, designed for 3 x 8-inch round layers). The base recipe is the versatile Chocolate Butter Cake, but made using the instructions for the Root Beer Variation (a simple switch out of the vanilla extract, less buttermilk and addition of real root beer). The butter cake layers are chocolatey, rich and super tender. They would pair beautifully with almost any frosting and filling! We fill the layers with a version of the Vanilla Bakery Frosting from the book, using the Vanilla Ice Cream Bakery Frosting variation, which is essentially a fluffy "American-style" frosting (usually refers to a sweet frosting made with butter and confectioners' sugar), but we add some melted vanilla ice cream, heavy cream and vanilla bean paste for a really authentic and decadent frosting/filling. The added whipping time incorporates a lot of air, which wouldn't necessarily be desired, but in this case we love the ice-creamy texture. The texture also lends itself to our trompe l'oeil ice cream scooplings on top of the cake--it thickens nicely in the fridge and scoops up like a dream. We frost the entire cake with Chocolate Cloud Frosting (I've made a version of this several times on the blog, but the version from the book is what I used for this cake), done with the Root Beer Variation. I use a food processor for this frosting, because it is so quick (all of the ingredients in the processor and buzzed about!), and the result is incredibly satiny and smooth. Trust me when I say the smoother the frosting, the easier the frosting process is, making it a faster and more rewarding frosting experience. See the photo below!
  Here is a close up of our Vanilla Ice Cream Bakery Frosting. Creamy, sweet vanilla-extreme deliciousness! And we love those little vanilla bean specks, don't we?
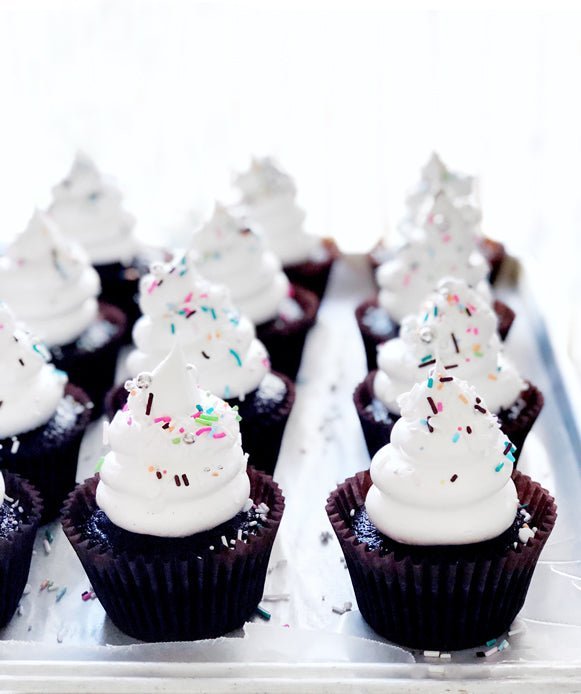
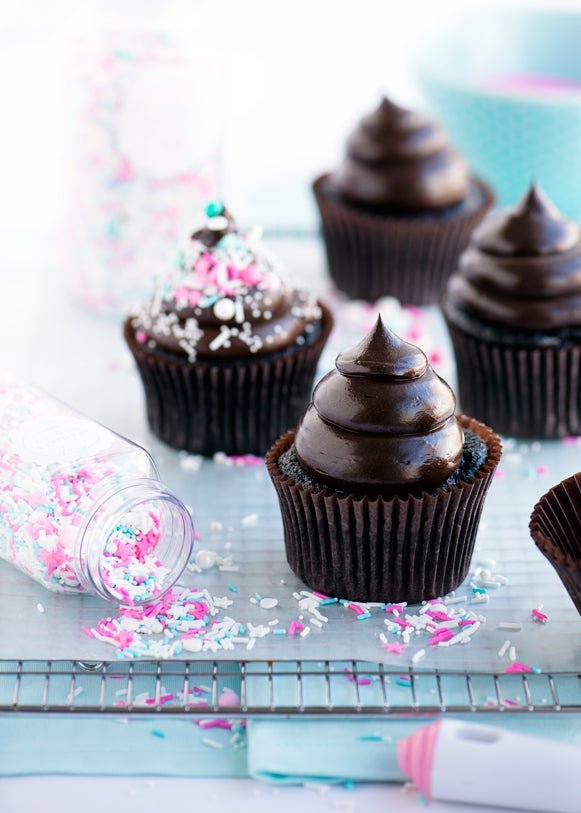
We then add a simple and decadent Shiny Chocolate Glaze, which again I have made in the Root Beer variation. This stuff is incredible! You can melt all of the ingredients in one vessel in the microwave, and in about 90 seconds, have versatile, super-shiny goodness. If you use quality chocolate (which I know you will do!), this stuff can stand on its own on brownies, cupcakes and more. A healthy but light-handed dose of rainbow nonpareils and edible silver stars plus a perfect stemmed cocktail cherry on top is what gives this cake its almost retro, diner-style root beer float pizazz.
 And the Chocolate Cloud Frosting we talked about above. Guys...it's everything.
  Not the most perfect sliced shot, but the party cut (strips of cake) makes cake look so appealing to me! I just love this.
  You'll see here, that all you need to do to serve up a round cake this way (this yields many more servings, particularly with tall cakes) is take one straight slice using a long serrated bread knife (ideally--otherwise just a long straight bladed knife) from the front while holding a cutting board flat against the cake, let it lean upon the cake board and then with the board on the table, slice the cake in long even strips. For children, or smaller servings, you can cut the long strips in half again, to end up with two shorter pieces. Repeat until you've made your way through the entire cake!
  Delightful. So let's make this cake, friends!
Root Beer Float Layer Cake
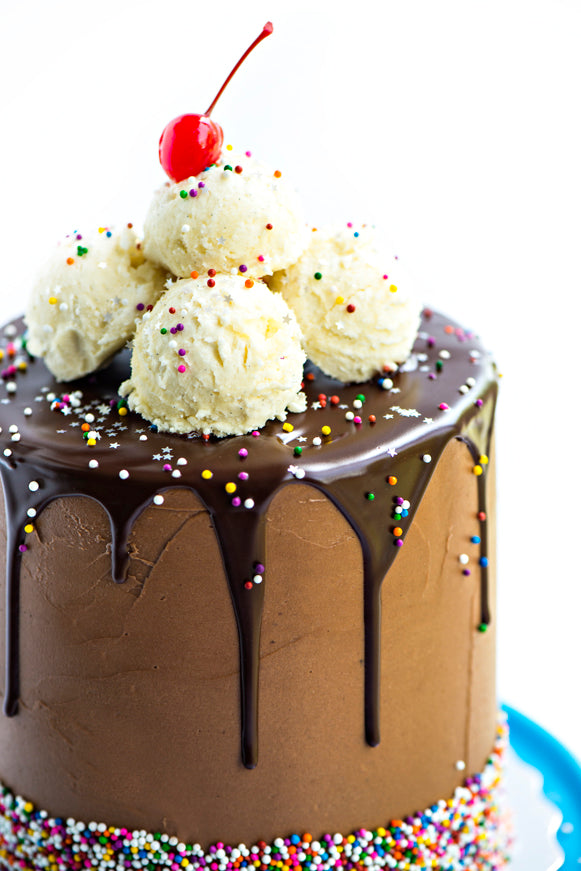
An adaptation from the Chocolate Root Beer Float Cake in The Sweetapolita Bakebook, this 4-layer, 6-inch round cake is a showstopper for any occasion. Four layers of super-moist, buttery chocolate root beer-infused cake filled with creamy vanilla "ice cream" frosting, topped with fluffy, satiny root-beery chocolate frosting and topped with shiny chocolate root beer glaze, scoops of vanilla ice cream frosting and sprinkles (of course).
For the Chocolate Butter Cake Layers (Root Beer Variation):
- 2 cups (240g) all-purpose flour
- 3/4 cup (60g) best-quality Dutch-process dark cocoa powder (see notes)
- 1 1/3 tsp baking powder
- 1/2 tsp salt
- 1/2 cup (120ml) buttermilk, room temperature
- 1 cup (240ml) root beer (not diet)
- 3/4 cup (170g) unsalted butter, room temperature
- 1 2/3 cup (332g) packed light brown sugar
- 3 eggs, room temperature
- 3 tablespoons (45ml) mayonnaise, room temperature
- 1 1/3 tsp baking soda
- 1 1/2 tsp distilled white vinegar
- 3/4 tsp root beer flavour oil OR 1 1/2 tsps of root beer extract (see notes)
For the Vanilla Bakery Frosting (Vanilla Ice Cream Variation):
- 1 cup (225g) unsalted butter, room temperature
- Pinch of salt
- 3 1/4 cups (410g) confectioners' sugar, sifted
- 1/2 cup (120ml) heavy cream
- 2 tsp (10ml) pure vanilla extract or vanilla bean paste
- 1/2 cup (120ml) melted vanilla ice cream (in a pinch, you can use 1/2 cup of half-and-half)
For the Chocolate Cloud Frosting (Root Beer Variation):
- 2 cups (454g) unsalted butter, room temperature
- 4 cups (500g) confectioners' sugar, sifted
- 1/3 cup (80ml) heavy cream
- 1 tsp (5ml) root beer flavour oil (see notes)
- Pinch of salt
- 7 ounces (200g) best-quality dark chocolate, chopped or callets/discs (see notes)
For the Shiny Chocolate Glaze (Root Beer Variation):
- 5 ounces (150g) best-quality dark chocolate, chopped or callets/discs (see notes)
- 3/4 cup (170g) unsalted butter
- 1 tbsp light corn syrup
- Pinch of salt
- 3/4 tsp root beer flavour oil or 2 tsp of root beer extract (see notes)
You will also need:
- 1 round or scalloped cake board, either 7 or 8" round (optional )
- 1 offset palette knife (see notes)
- 1 straight palette knife (see notes)
- 1 ice cream scoop or large cookie scoop (see notes)
For the Chocolate Butter Cake (Root Beer Variation)
-
Preheat the oven to 350℉ (180℃ ). Grease the bottoms of two 6 x 2-inch round cake pans and line with parchment, or use a baking spray alone.
-
In a large bowl, whisk together the flour, cocoa powder, baking powder, and salt. In a large measuring glass with a spout, combine the buttermilk and root beer. Set aside.
-
In the bowl of an electric mixer fitted with the paddle attachment, beat the butter and brown sugar on medium speed until very light and fluffy, about 8 minutes. Add the eggs one at a time, mixing well and scraping the sides of the bowl with a rubber spatula after each addition. Beat in the root beer flavour oil or extract.
-
Remove the bowl from the mixer, and using a rubber spatula, fold in one-third of the flour mixture until just combined. Add half of the buttermilk mixture and fold until just combined. Repeat with the remaining flour and buttermilk mixtures. Fold in the mayonnaise.
-
In a small bowl, whisk together the baking soda and vinegar, and quickly fold into the batter. Don't over-mix. Divide the cake batter among the prepared pans. Bake two pans in the centre of the oven until a wooden pick inserted in the centre comes out with a few crumbs, 20 to 25 minutes (this can vary). Repeat with the final two layers. Let the cakes cool in the pans on wire racks for 10 minutes. Run a knife around the edges to loosen, and carefully turn the layers out onto wire racks. Peel off the paper, and let cool completely.
For the Vanilla Bakery Frosting:
-
In the bowl of an electric mixer fitted with the paddle attachment, beat the butter, shortening, and salt on medium speed until very pale and creamy, 8 minutes. Gradually add the confectioners' sugar, heavy cream, vanilla, and melted vanilla ice cream.
-
Reduce the speed to the lowest setting and beat for 1 minute. Increase the speed to medium-high and beat until very light and fluffy, about 6 minutes.
-
The frosting will keep in an airtight container in the refrigerator for up to 3 days. Bring chilled frosting to room temperature and beat on low speed to soften. If necessary, you can warm the frosting in a heatproof container in the microwave in 10-second intervals, stirring after each one, until smooth and spreadable.
For the Chocolate Cloud Frosting:
-
Put the butter, sugar, cream, root beer flavour oil, and salt into a food processor and pulse until combined, about 1 minute.
-
Melt the chocolate in the microwave. Add the melted and slightly cooled chocolate to the food processor and blend until smooth, about 1 minute. If the frosting is too soft, simply refrigerate until it firms up slight, about 10 minutes.
-
For ideal spreading consistency, it is best used right away. The frosting will keep in an airtight container in the refrigerator for up to 3 days. When ready to use, bring it to room temperature and beat on low speed to bring it back to spreadable consistency.
-
Assembly of the Root Beer Float Layer Cake:
-
Place one of the cake layers, top up, on a cake board or plate (reserve the "sharpest" edged layer for the top). Using a small offset palette knife, spread 1 cup of the ice cream frosting on top, reaching about 1/2 inch from the edge. Repeat these steps until you come to the final cake layer, which you will place bottom up. Reserve the remaining ice cream frosting and cover in plastic wrap and chill. Wrap the cake tightly in plastic wrap. Chill for 15 minutes.
-
Remove the cake from the refrigerator and unwrap. Place the cake on a turntable, and frost the entire cake with a thick coat of the chocolate cloud frosting and smooth. Refrigerate for 10 minutes, and then
For the Shiny Chocolate Glaze (Root Beer Variation):
-
STOVETOP METHOD: In a medium heatproof bowl set over barely simmering water, melt the chocolate, butter, corn syrup, root beer flavour oil, and salt until smooth, stirring occasionally. Remove the bowl from the heat and let cool slightly. MICROWAVE METHOD: Add all of the ingredients to a heatproof bowl or measuring cup with spout. Microwave at high heat for 1 minute, then stir. Continue to heat in 30 second intervals until the mixture is completely melted. The glaze will keep in an airtight container in the refrigerator for up to 1 week. When ready to use, warm the glaze over a pan of simmering water or in the microwave.
-
Make the chocolate glaze and let it cool just enough so it won't melt the frosting but will pour freely. Pour a thin, steady stream around the top perimeter of the cake, until you have gone all the way around. Pour just enough to cover the top of the cake, pushing it to meet the edges, with your small offset palette knife. Refrigerate for about 5 minutes. Sprinkle the top of the cake with a small amount of rainbow sprinkles.
-
Remove the remaining Vanilla Ice Cream Bakery Frosting from the refrigerator, and use an ice cream scoop or large cookie scoop to scoop the remaining ice cream frosting onto the top of the cake. Drizzle with the remaining chocolate glaze, sprinkle with more rainbow sprinkles, and top with a cherry.
-
The cake will keep at cool room temperature for up to 3 days.
- For the cocoa powder for the cake layers, I used Cacao Barry Extra Brute cacao powder . You can use any dark cocoa powder you like, but I urge you to use the best quality you can find.
- For the Root Beer Flavour Oil, I used LorAnn Root Beer Flavour Oil; I also used A&W Root Beer in the batter.
- For the cake-layer baking, I used these Fat Daddio's 6-inch x 2-inch round cake pans.
- For the the vanilla bean paste in the Vanilla Ice Cream Bakery Frosting, I used Nielsen Massey Madagascar Bourbon Vanilla Bean Paste.
- When frosting a cake, I always use this Ateco turntable, an offset icing spatula and a straight icing spatula.
- For the glaze, I used Callebaut Semi-Sweet Callets.
- For the scooping of the "ice cream" on top of the cake, I used this Norpro Large 56mm Stainless Steel Scoop (also perfect for making large cookies!).
- For the sprinkles, I used Sweetapolita Rainbow Nonpareils + Edible Silver Stars, but you can use any sprinkles you love!
- You can make and keep this cake assembled for a day before you serve. You can keep it at a cool room temperature, or in the fridge, but just make sure it's room temperature when you serve it.
- The cake stand in the image (one of my favourites!) is a Mosser Bonnie Blue 8" cake stand.
- Happy baking, friends!
See you super soon with another recipe, friends!