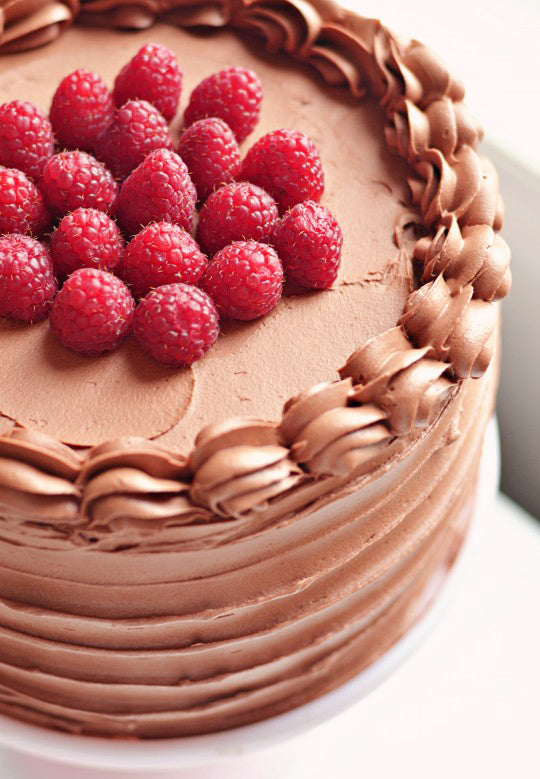
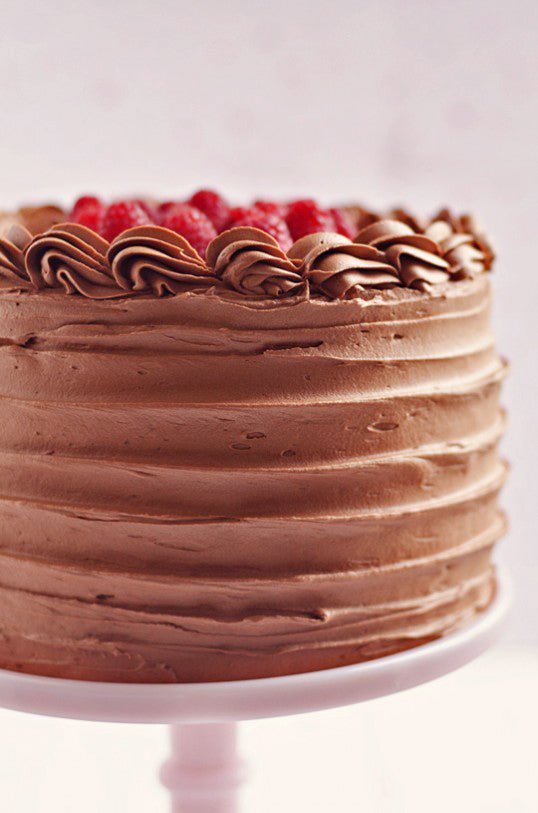
 Cake! It's been a little while since I've shared a cake with you, I just realized. But don't worry, it's not for lack of making them. I've been experimenting with red velvet layer cake for about 2 weeks now because I somehow became rather fixated on creating the most addictive version I could. I made one a day for about 8 days, and then spent a few days coming up with what I felt would be the yummiest flavour and texture combination. (Don't worry, the runner-up versions are now frozen and eagerly await turning into red velvet cake pops). I know we've chatted about red velvet before (you might remember this Red Velvet & Cinnamon Layer Cake or these Black Velvet Cupcakes with Cherry Cream Cheese Frosting), and as much as I loved those recipes, I just felt compelled to experiment. A lot. And then it happened -- just in time for Valentine's Day, I fell in love. I fell in love with layers of super-moist red velvet cake, fluffy pink whipped vanilla cream filling with fresh raspberries, creamy marshmallow cream cheese frosting, satiny Belgian chocolate frosting and a pile of fresh raspberries on top.

So what is red velvet cake? Well it's was said to originate at the Waldorf Hotel in New York, but has become a southern staple. Essentially it's a vanilla buttermilk cake with a touch of cocoa powder and then boosted with heaps of deep red colour (and typically paired with a classic cream cheese frosting). I have always made the cake using the traditional vanilla extract and super red food colour paste, but my flurry of red velvet attempts this month were inspired by Red Velvet Cake Bakery Emulsion Flavor. It's a colour and flavour all-in-one, but the flavour has this amazing citrus-y-ness to it, that I find rather addictive and pleasing. I love emulsions of this kind because they keep their taste even through baking, yielding the most delicious cakes and cookies. You can certainly make this recipe without it by substituting vanilla extract and red colour, but I feel it's worth trying. I'll likely use it every time I make the beloved red velvet cake from now on. The thing was I couldn't decide if I wanted the cake to be a towering 6-layer cake with seemingly endless layers of alternating filling, or if I wanted to keep those 3 cake layers as they were and make it a little simpler with a really generous layer of each type of filling sandwiched inside. So . . . I did it both ways.

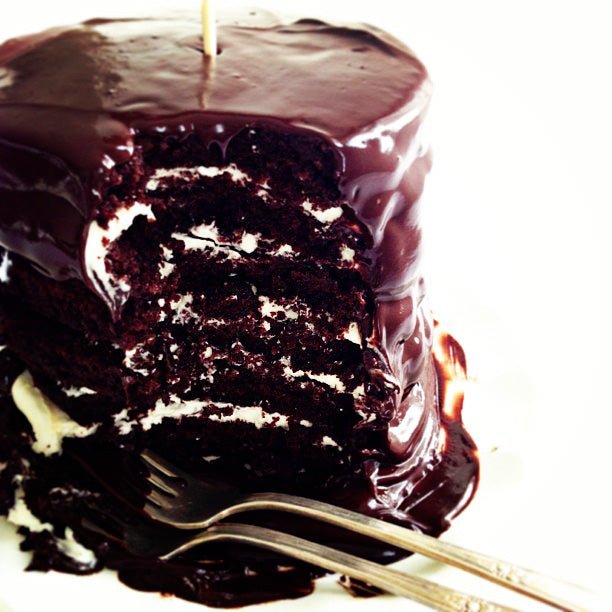
This is the 6-layer version, which is essentially the same 3 layers split into two each, so each version technically has the same amount of cake, but more filling.

One of my favourite components of this cake is the light-as-air pink whipped vanilla cream and fresh raspberry filling. With the moist density of the red velvet cake, the tangy sweetness of the marshmallow cream cheese filling and depth of the dark chocolate frosting, that hit of cloud-like raspberry cream balances every bite.

So why did I have to make so many cake layers before settling on a winner? Well, I found that if they were butter cakes, they would dry out, especially when I refrigerated them, which wasn't going to work since this cake should be refrigerated (due to the whipping cream, raspberries and cream cheese). I tried a few that were oil-based, like my favourite one-bowl chocolate cake recipe, but as moist as they were, they tasted so oily to me -- almost like carrot cake minus the carrots. Maybe that's just my heightened taste buds, but I couldn't get past it. So I knew I had to go back to a butter-based cake, and then I remembered the devil's food cake from my Inside-Out Neapolitan Cake -- it's moist and decadent. So I started with that and gave it the old red velvet treatment by altering the quantities and incorporating the flavor emulsion, an extra hit of red colour, etc. With a mix of brown and white sugar along with a dollop of mayonnaise, the cake is so flavourful and moist.

Here's the 3-layer version, which is no less delightful, but rather a tad shorter and has more cake representation with its thicker layers.

Trust me that what this dessert lacks in neat-and-tidyness, it makes up for in taste and addictive messiness. ♥
Red Velvet & Raspberry Supreme Cake
Super-moist and decadent red velvet cake filled with pink whipped vanilla cream with raspberries, creamy marshmallow cream cheese filling and smothered in a satiny and fluffy chocolate frosting topped with more fresh raspberries.
For the Cake:
- 3/4 cup (170 g) unsalted butter, at room temperature
- 1 cup (225 g) packed light brown sugar
- 1 cup (200 g) white sugar
- 3 tablespoons (45 ml) *red velvet flavor
- 1 teaspoon super red colour (optional)
- 3 eggs (at room temperature)
- 2 cups (260 g) all-purpose flour
- 1/2 cup (55 g) cake flour
- 1 tablespoon (8 g) Dutch-process cocoa powder
- 1 teaspoon (8 g) kosher salt
- 1-1/2 cups (360 ml) buttermilk, warm
- 1/4 cup (60 ml) mayonnaise
- 1 tablespoon (15 ml) vinegar
- 1-1/4 teaspoons (8 g) baking soda
For the Marshmallow Cream Cheese Filling:
- 1/2 cup (63 g) icing sugar (confectioners' or powdered), sifted
- 1/2 cup butter (115 g, at room temperature)
- 1/4 cup (57 g) cream cheese, softened
- 1/2 teaspoon (2.5 mL) pure vanilla extract
- 1/2 jar (106 g marshmallow cream (such as Marshmallow Fluff))
- A pinch of salt
For the Pink Whipped Vanilla Cream Filling:
- 2 tablespoons (30 ml) cold water
- 1-1/2 teaspoons unflavoured gelatin (such as Knox brand)
- 1-3/4 cups (420 ml) whipping cream (35-37% fat), cold, divided
- 1/2 cup 63 g icing sugar
- 1 teaspoon 5 ml pure vanilla extract
- A pinch of salt
- A drop or two of red or pink gel paste
For the Chocolate Frosting
- 2 cups (1lb/454 g or 4 sticks) unsalted butter, at room temperature
- 4 cups (500 g) icing sugar sifted
- 1 tablespoon (15 mL) pure vanilla extract
- Pinch of salt
- 8 oz (250 g) quality dark or extra dark chocolate, chopped, melted and slightly cooled
- 1/2 cup (120 ml) whipping cream (35-37% fat)
- 2 cups fresh raspberries (washed and dried)
For the Cake:
- Preheat oven to 350° F. Butter the bottom of three 8-inch round cake pans, line with parchment rounds, and dust with flour, tapping out the excess.
- In a stand mixer fitted with the paddle attachment, beat the butter, sugars, red velvet flavor, and red gel paste on medium-high speed until lighter in color and slightly increased in volume, about 5 minutes. Lower the speed to medium and add the eggs, one at a time, mixing until each is fully incorporated before adding the next.
- Sift the flour and cocoa powder into a medium bowl. Add the salt to the dry ingredients after sifting, and whisk dry ingredients. Alternate dry ingredients and buttermilk into creamed mixture, beginning and ending with dry ingredients. Mix until just incorporated, or finish by hand gently. Fold in mayonnaise.
- In a small cup or bowl, combine the vinegar and baking soda until it fizzes, then quickly add the batter and whisk until blended.
- Divide the batter evenly between the prepared pans. If possible, weigh the batter in each cake pan for 460 g each (excluding the pans--you will want to tare the scale each time.) This ensures even layers. Smooth with small offset palette knife, and bake on top of a baking sheet (two pans on sheet for first round, then the final pan) until a toothpick inserted in the center comes out clean, about 25 minutes. Try not to over-bake.
- Let pans cool on wire rack for 20 minutes, then invert cakes onto racks, gently, peeling away parchment rounds. Let cool completely.
For the Marshmallow Cream Cheese Frosting:
- In an electric mixer fitted with paddle attachment, combine butter and icing sugar on low until blended, about 1 minute. Add vanilla and salt and mix on medium speed for about 3 minutes.
- Add marshmallow cream and cream cheese and beat until combined and creamy, about 1 minute.
For the Pink Whipped Vanilla Cream Filling:
- In a small bowl, place the cold water and sprinkle with the gelatin. Let sit for at least 10 minutes. In a small saucepan, bring 1/2 cup of the cream just to a simmer, then stir into the gelatin mixture. Refrigerate, stirring frequently, until cool but not set, about 8 minutes.
- In a chilled stainless steel bowl, beat the remaining whipping cream, icing sugar, vanillla and salt until it thickens slightly and soft peaks form. Slowly add the gelatin mixture and food colouring and continue beating until medium-firm peaks form (should be thick enough to spread). Keep covered and chilled until ready to use.
For the Chocolate Frosting:
- In a bowl of stand mixer fitted with paddle attachment, combine the icing sugar and butter and beat on low speed for about 1 minute. Add vanilla and salt, and beat on low until well combined. Add the melted chocolate and beat on medium speed until smooth (about 2 minutes). Add whipping cream and beat on med-high speed for another minute.
Assembly of the Red Velvet & Raspberry Supreme Cake:
- On an 8"inch round cake board (or cake plate), put a small dollop of frosting.
For a 3-layer cake (3 cake layers + 2 layers of filling):
- Place your first layer face-up on the board (or plate) and spread the Marshmallow Cream Cheese Frosting, leaving about 1/2" around the edge, using an offset palette knife. Place the second cake layer face-up and repeat with a thick layer of Pink Whipped Vanilla Cream Filling. Gently press a layer of fresh raspberries into the filling, slightly spaced apart. Top with another thick layer of the Pink Whipped Vanilla Cream Filling and spread evenly using your offset palette knife.
- Place your third cake layer atop the pink filling, face-down. Gently adjust the cake so that it is straight and lined up properly. Cover with plastic wrap and refrigerate for about 30 minutes.
- Stir the Chocolate Frosting well with a rubber spatula to remove air bubbles, and then frost the entire outside of the cake until you have a smooth layer, sealing in all crumbs. Refrigerate until the frosting firms up, about 30 minutes. Repeat with thick and even layer of the frosting, adding some swirls or patterns using a large spatula. Top with fresh raspberries and a sprinkling of icing sugar, if desired.
- Keep refrigerated (this cake will stay moist!) but serve at room temperature.
For the 6-layer version:
- Cut your 3 cake layers each once horizontally with a long, serrated knife, so you have a total of 6 layers (layers will be thin).
- On an 8"inch round cake board (or cake plate), put a small dollop of chocolate frosting. Place your first layer face-up on the board (or plate) and cover with 1/6 of the Pink Whipped Vanilla Cream Filling, leaving about 1/2" clearance around the edge. Gently press a layer of fresh raspberries into the filling, and then cover with another 1/6th of the filling, spreading until even. Place another cake layer face-up and cover with 1/2 of the Marshmallow Cream Cheese Frosting, spreading until even.
- Repeat until you come to your final layer, which you will place face-down. If you find the cake too soft and unstable, put in refrigerator for a few moments to firm it up, then resume.
- Cover the entire cake gently with plastic wrap, and then, once covered, use your hands to carefully ensure the cake is lined up straight. Chill for at least 30 minutes.
- Stir the Chocolate Frosting well with a rubber spatula to remove air bubbles, and then frost the entire outside of the cake until you have a smooth layer, sealing in all crumbs. Refrigerate until the frosting firms up, at least 30 minutes. Repeat with thick and even layer of the frosting, adding some swirls or patterns using a large spatula. Top with fresh raspberries and a sprinkling of icing sugar, if desired. Or, sprinkle a few Chocolate Crunchy Sprinkles or a medley you love!
I have recently started using Lorann Red Velvet Flavor, which gives the cake its dark, red colour and just slightly-citrus taste that doesn't fade once the cake is baked. If you can't get this ingredient, you can replace with 1 oz of red liquid food colouring, or 1-2 tablespoons of a super red gel paste colour along with 1 tablespoon of pure vanilla extract.
[whipped cream filling adapted from Bon Appetit Desserts]
Sweetapolita's Notes:
- I now swear by Lorann Flavoring Oil Red Velvet Cake Bakery Emulsion Flavor -- with its concentrated colour/flavour all in one, it's worth it (to me).
- I always bake layer-by-layer (so 3 cake pans for 3 layers). For this cake I used three 8" Round Cake Pans
-- it's a bit of an expense dishing out for 3 pans at once, but if you're like me, you'll find they're always in use!
- I also use Parchment Rounds for ease and convenience.
- If you don't have access to Marshmallow Fluff (or other marshmallow creme), for the Marshmallow Cream Cheese Filling, you can simply omit it from the recipe and replace with extra cream cheese.
- This cake stays incredibly moist even after being refrigerated. Be sure to not leave it out for more than about 4 hours at room temperature (due to the fresh raspberries). Just be sure to remove the cake about two hours before serving, so that it's at room temperature when eaten.
Good luck & enjoy!


